

WIX
Complete these steps to enable your customers to use Afterpay as a payment method on your website.
Before you begin, make sure you have a registered Afterpay account.
Install and configure Afterpay
-
Log in to the Wix Website Admin Portal. The My sites page appears.
-
Select the site you want, normally this is the name of your store.
-
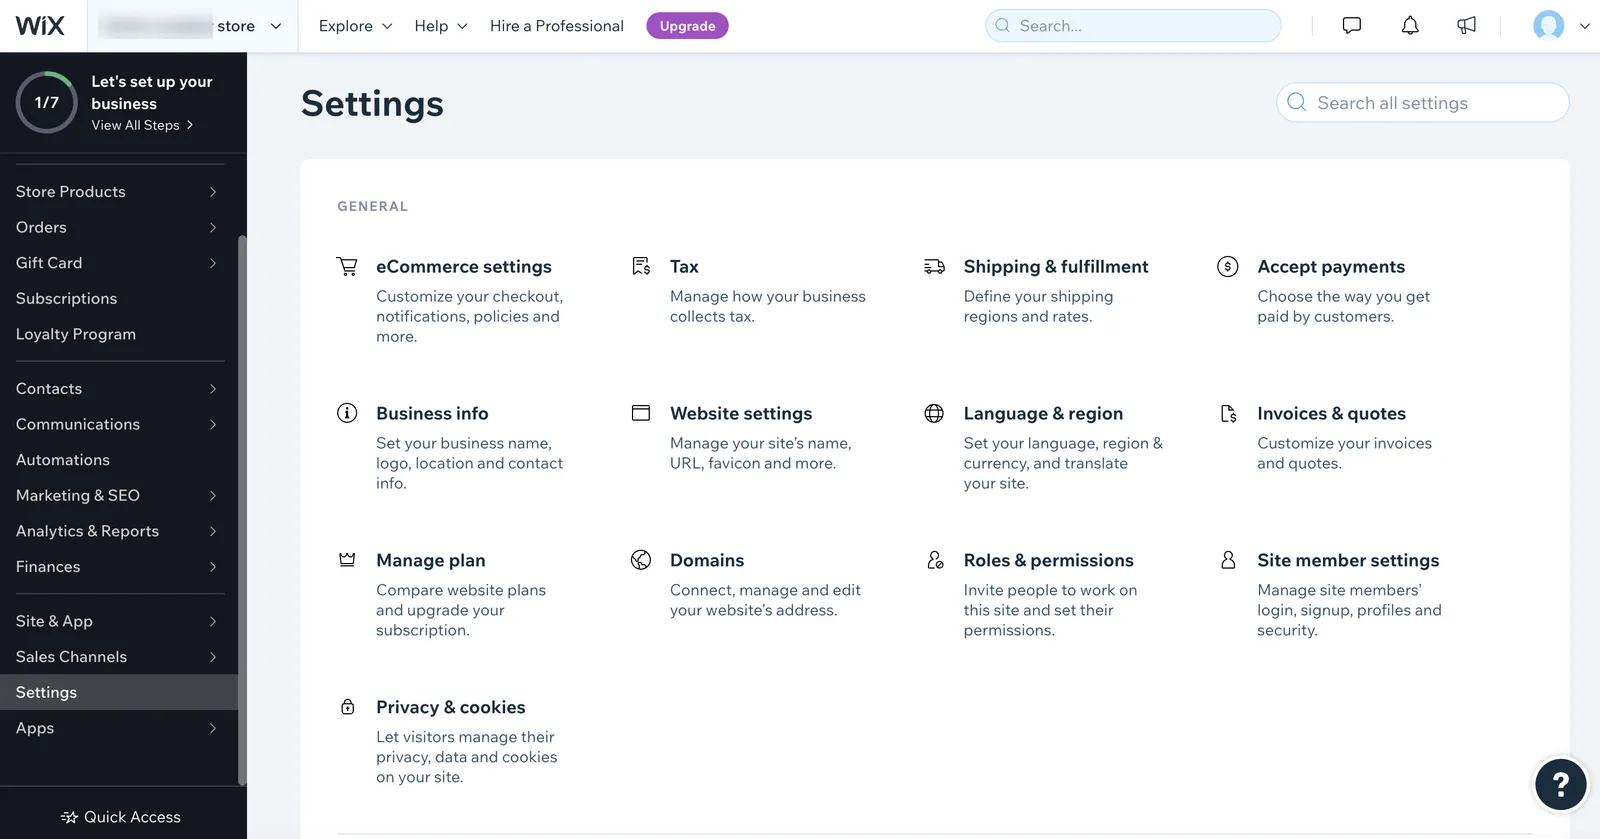
From the left side menu, select Settings. The Settings page appears.
-
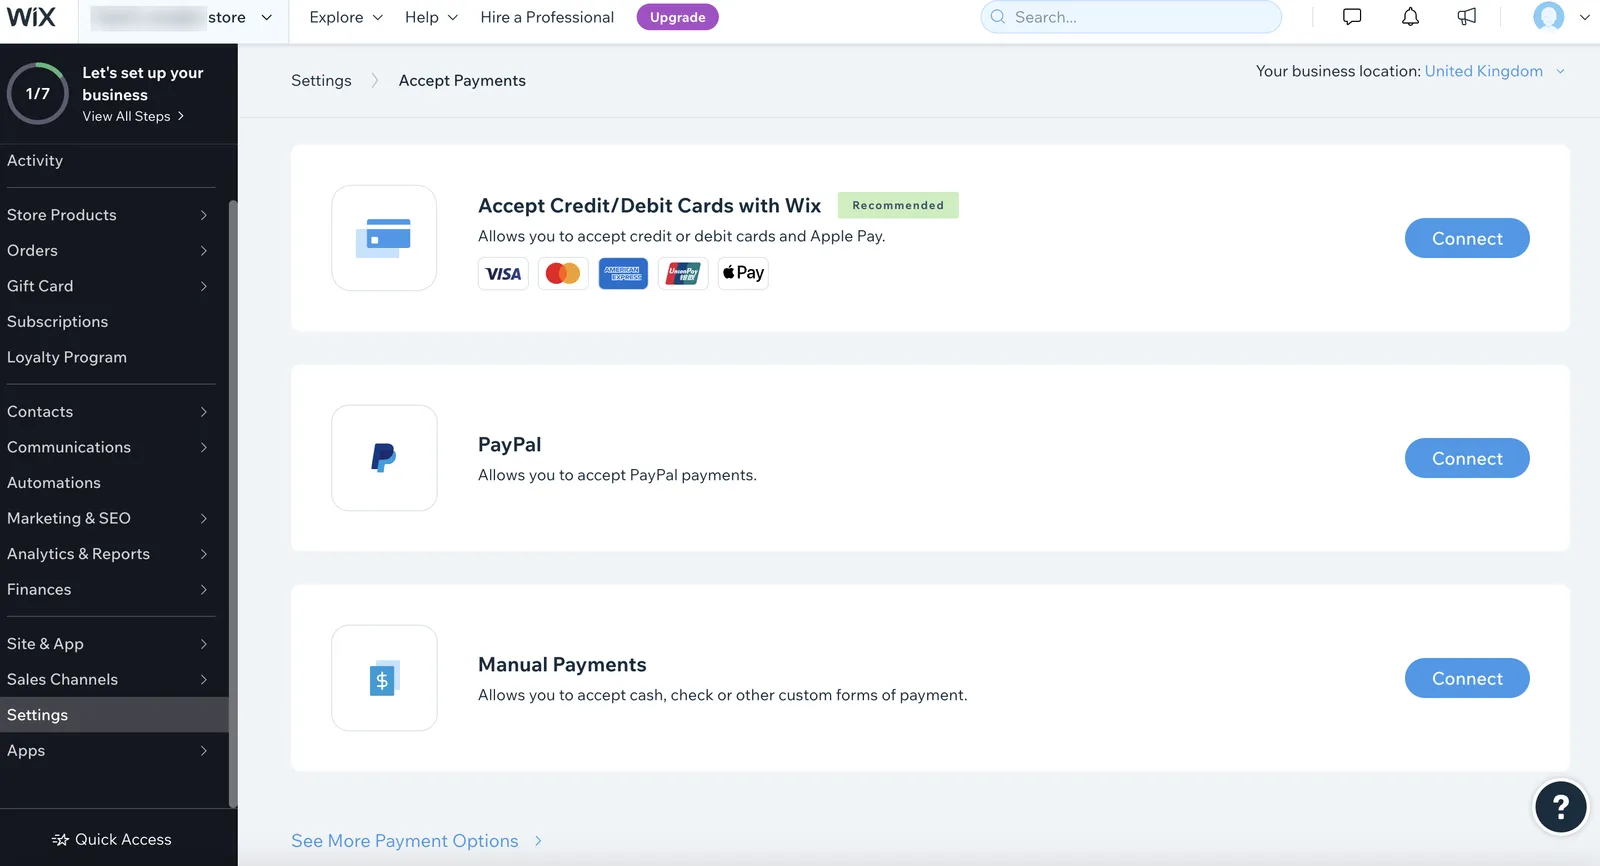
Click Accept payments, the Accept Payments page appears.
-
Look at the top-right of the screen. There is a Your business location: field. This should be the region you registered for Afterpay. If it shows the wrong region, click the down chevron and select the correct region.
-
At the bottom of the page, click See More Payment Options, the More Payment Options page appears. Scroll down the page to find Afterpay.
-
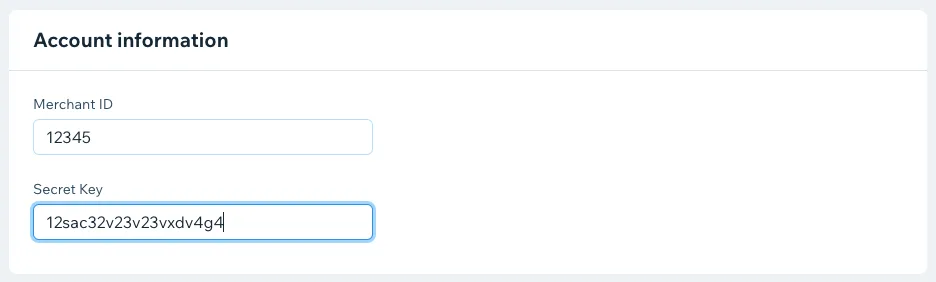
Click Connect, the Connect Afterpay page appears. Follow the instructions on the page. You must enter the Merchant ID and Secret Key that we have given you.
-
Click Connect. Afterpay has now been added as a payment method. Your Payment Methods page should now include Afterpay. Your customers can now use Afterpay to buy goods or services from you.
Only use Sandbox mode when instructed by an Afterpay account manager or other technical expert.
Supported countries and regional settings
Afterpay is available for domestic purchases, using local currency in multiple regions. For example, a merchant based in the United States can only offer Afterpay with US dollars.
To change your settings:
-
Log-in to Wix and go to the Settings menu, just like step 3 in the procedure above.
-
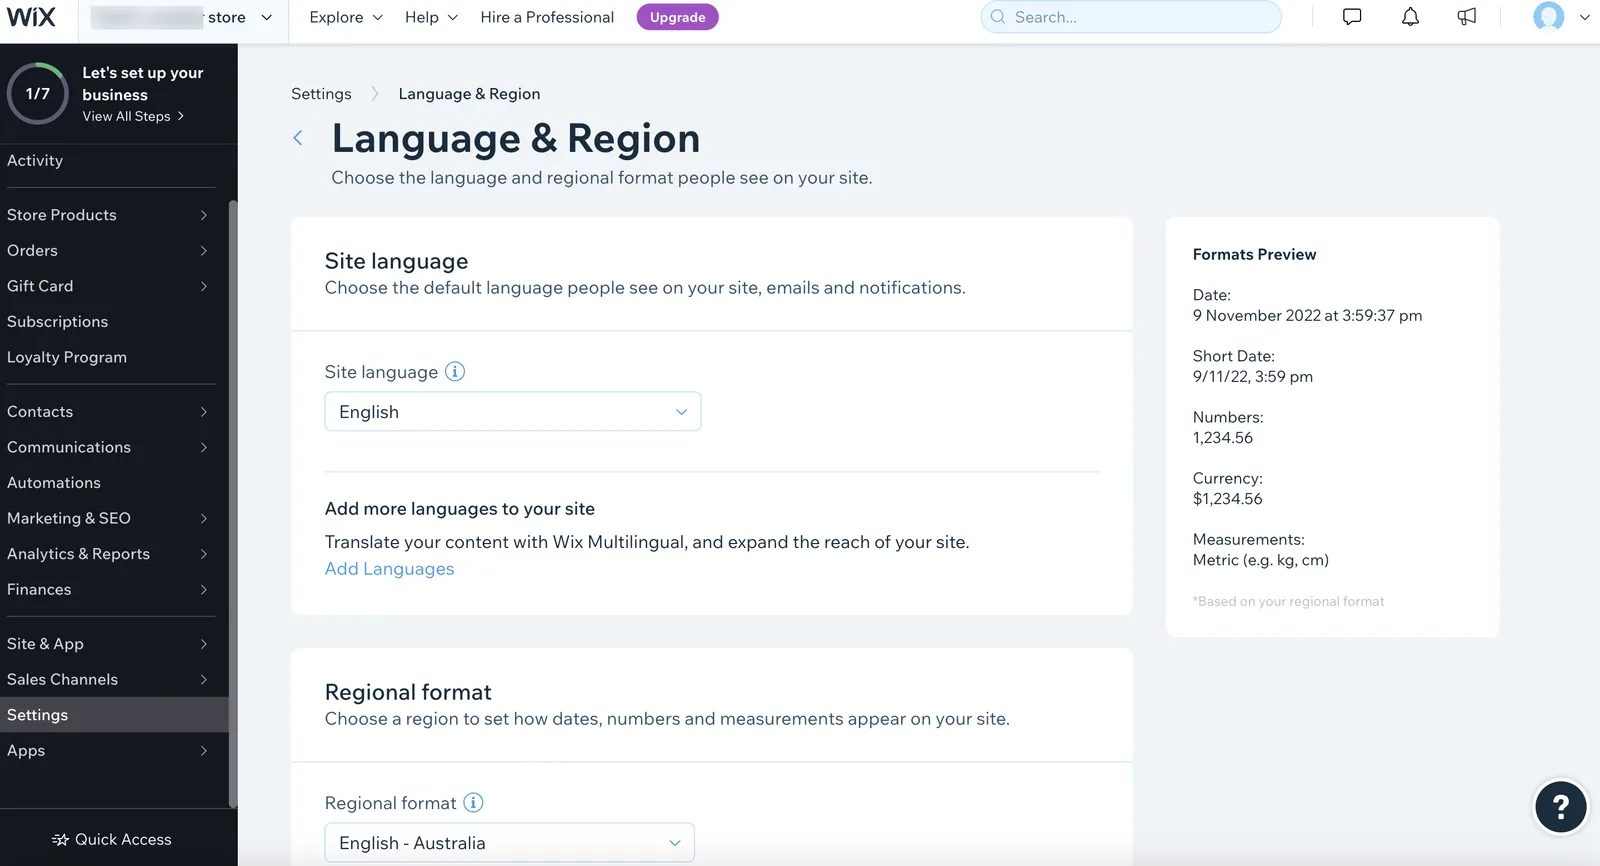
Click Language & region, the Language & Region page appears.
-
Make the changes you want.
-
Click the Save button in the top right corner of the page.
To check your regional settings, log in to Wix and navigate to Settings > General Info and scroll down to Regional Settings.
Afterpay is available for Wix merchants with a store in these countries:
-
🇦🇺 Australia
-
🇳🇿 New Zealand
-
🇨🇦 Canada
Afterpay is known as Clearpay and is available for Wix merchants with a store in:
Afterpay is known as Clearpay and is available for Wix merchants with a store in: