Set up express checkout with integrated shipping

Express checkout uses the same APIs as standard checkout. Integrated shipping enhances the experience by embedding your shipping options directly into Afterpay express checkout, streamlining the process. When paired with the Buy Now flag, it creates a one-step checkout.

To set it up:

  1. Generate a Afterpay order token to start the express checkout process
  2. Create an express checkout button to load the checkout window
  3. Create the checkout using Afterpay.js
  4. Capture payment to finalize the order

When using integrated shipping, you must launch the checkout in a popup. The redirect method isn’t supported.

Generate an Afterpay order token

Before launching Afterpay express checkout, create an order token by calling the Create Checkout endpoint. This lets you specify the order amount, items, and other details.

The backend call is triggered when the express checkout button is clicked. A new token is required for each order. If you store the token in a database, be sure to support arbitrary string length and content, as a token’s format can change.

For express checkout orders, there are two key differences from standard checkout:

  • Set mode to express
  • Use a single popupOriginUrl instead of redirectConfirmUrl and redirectCancelUrl
1curl --request POST \
2 --url https://api-sandbox.Afterpay.com/v2/checkouts \
3 --header 'accept: application/json' \
4 --header 'content-type: application/json' \
5 --data '{"amount":{"amount":"10.00", “currency”: “AUD”}, “mode”: “express”, "merchant": {"popupOriginUrl": "https://example.com"}}'

Create an express checkout button

When a customer clicks this button on a cart or product page, it launches Afterpay checkout in a popup.

  1. Add a standard HTML <button> element wherever you want it to appear on your website.
  2. Assign a unique ID (for example, Afterpay-express-button). This allows you to have multiple buttons on the same page.
  3. Set the entry point using the data-Afterpay-entry-point attribute. Allowed values are:
    • product-page
    • mini-cart
    • cart
  4. Set the button label using the data-Afterpay-checkout-button-label attribute. This identifies the button for analytics or tracking purposes.
1<button id="Afterpay-express-button"
2 data-Afterpay-entry-point="mini-cart"
3 data-Afterpay-checkout-button-label="Check out using Afterpay">
4 Check out using Afterpay
5</button>

Button options

Multiple button styles are available, each clearly communicating the next step to the customer.

Options for the Afterpay Button

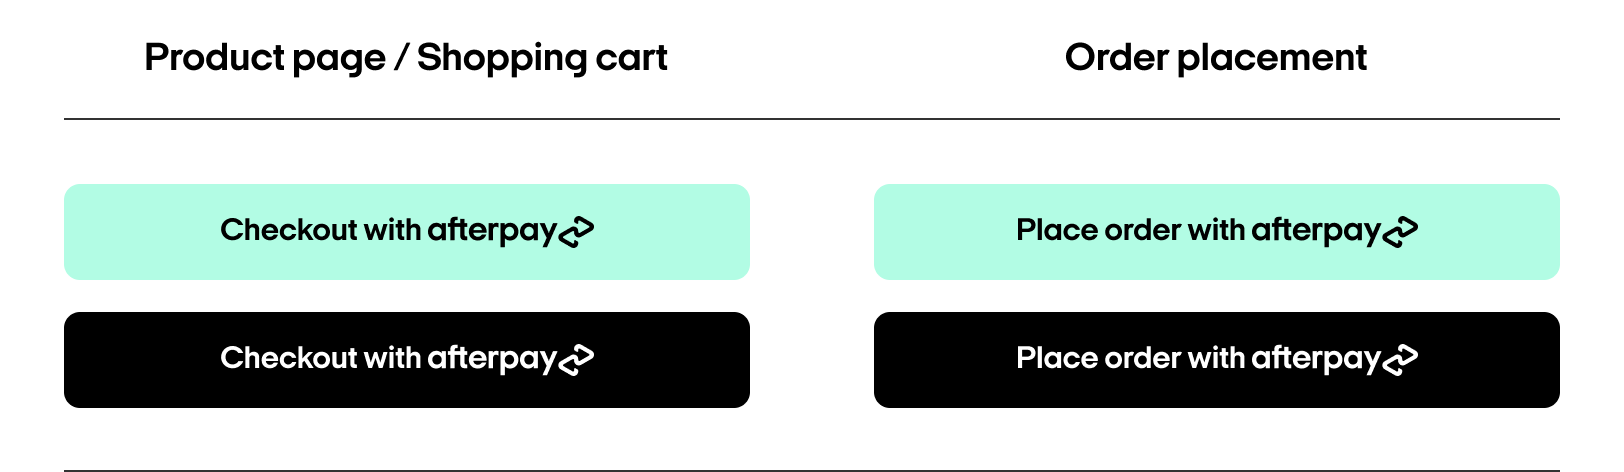
Integration assets are available here, or contact your Afterpay merchant services representative.

Create checkout

Load Afterpay.js

Add the Afterpay.js script to your website. Set the onload attribute to point to a custom function that will initialize the popup (for example, initAfterpay).

1<script src="https://portal.sandbox.Afterpay.com/Afterpay.js? async onload="initAfterpay()">
2 </script>

Initialize the popup window

Define your initAfterpay() function before loading the script. This function uses Afterpay.initializeForPopup() to configure the express checkout behavior. Configure the following properties:

  • countryCode: Your merchant account’s two-character ISO 3166-1 code
  • addressMode: One of the provided address mode constants
  • target: The ID or class of the button that triggers checkout
  • Set the buyNow flag to true. This shows customers a “Buy Now” button for one-step checkout.
  • Handle lifecycle events:
    • onCommenceCheckout: Retrieve the Afterpay token from your server, then call actions.resolve(TOKEN) to start checkout.
    • onComplete: See Finalize the Order for details.
    • onShippingAddressChange: See Listen for Address Changes for details.
1<html>
2 <head>
3 <script>
4 // ensure this function is defined before loading Afterpay.js
5 function initAfterpay () {
6 Afterpay.initializeForPopup({
7 countryCode: 'AU',
8 onCommenceCheckout: function (actions) {
9 /* retrieve Afterpay token from your server */
10 /* then call `actions.resolve(token)` */
11 },
12 onComplete: function (data) {
13 /* handle success/failure of checkout */
14 },
15 target: '#Afterpay-express-button',
16 addressMode: Afterpay.ADDRESS_MODES.ADDRESS_WITH_SHIPPING_OPTIONS,
17 buyNow: true,
18 })
19 }
20 </script>
21 <script src="https://portal.sandbox.Afterpay.com/Afterpay.js? async onload="initAfterpay()">
22 </script>
23 </head>
24 <body>
25 <button id="Afterpay-express-button"
26 data-Afterpay-entry-point="mini-cart">
27 data-Afterpay-checkout-button-label="Checkout using Afterpay Express">
28 Checkout using Afterpay Express
29 </button>
30 </body>
31</html>

Address mode

To support different shipping types in the checkout, configure the addressMode property using one of the provided constants in the format Afterpay.ADDRESS_MODES.<NAME>, where <NAME> is one of the following:

ConstantDescription
With Shipping Options
ADDRESS_WITH_SHIPPING_OPTIONSDisplays checkout with the option for the customer to configure their shipping address and be able to select from the merchant’s list of available shipping options.
SHIP_TO_ORDER_ADDRESSDisplays checkout with the chosen customer shipping address and be able to select from the merchant’s list of available shipping options. See preselected shipping address order for more details.
PICKUP_FROM_ORDER_ADDRESSDisplays checkout with the chosen merchant pickup address for the order. See pickup orders for more details.
Without Shipping Options
ADDRESS_WITHOUT_SHIPPING_OPTIONSDisplays checkout with the option for the customer to configure their shipping address only.
SHIP_TO_ORDER_ADDRESS_WITHOUT_SHIPPING_OPTIONSDisplays checkout with the option for the customer to configure their shipping address only with the intention to continue their order back on the merchant.
NO_ADDRESSDisplays checkout with the option for the customer to configure their shipping address only with the intention to buy now.
Note

If addressMode isn’t specified, ADDRESS_WITH_SHIPPING_OPTIONS is used by default.

Customer completes checkout

When the customer clicks the Afterpay checkout button, a popup opens. The customer is prompted to log in and review their order details. They can select a payment method, delivery address, and shipping option.

After confirming their order, the popup closes and the customer returns to your site. Checkout completion is communicated via the onComplete callback.

Finalize the order

When the customer completes Afterpay express checkout, the onComplete Javascript function is called. It receives an event argument with a data field containing the following properties:

PropertyTypeDescription
statusstringThe order status: "SUCCESS" or "CANCEL"
orderTokenstringThe order token provided when initializing the checkout.
merchantReferencestring (optional)The merchant’s ID or reference number for the order.
orderInfoobject (optional)The order info (if available) from the checkout.

orderInfo data properties

PropertyTypeDescription
shippingAddressContactThe shipping address for the order.
shippingOptionobjectContains shippingOptionIdentifier, indicating the ID of the user’s chosen shipping option (integrated shipping only).
consumerConsumerContains the user’s givenNames, surname, and email. phoneNumber isn’t defined here.
1Afterpay.initializeForPopup({
2 // ...
3 onComplete: function (event) {
4 if (event.data.status == "SUCCESS") {
5 // The consumer has confirmed the payment schedule.
6 // Call your server here to retrieve the order details.
7 } else {
8 // The consumer cancelled the payment or closed the popup window.
9 }
10 },
11});

Get order details

Retrieve the transaction details by calling the Get Checkout endpoint. This is the source of truth for the order. It includes the user’s name, email address, delivery address, phone number, and order total.

Verify the order details to ensure that the shipping address, shippingOptionIdentifier, and resulting amount are valid and match your records.

Capture payment

Capture payment using the immediate payment flow. For express checkout, the payload must include an amount field.

Once payment is captured, the express checkout order is complete.

Note

For Cross Border Trade orders, ensure that the currency is consistent throughout the entire checkout flow.

For example, if you’re a UK merchant displaying a 100 GBP order in AUD for an Australian consumer on your site. For example, if you initiate checkout by sending us the order amount in GBP, then at capture the final order amount must also be in GBP.

Listen for address changes

The onShippingAddressChange callback lets you dynamically update shipping options and taxes based on the consumer’s shipping address. It receives two arguments: data (the address) and actions (callback functions).

Afterpay calls onShippingAddressChange when the customer first enters the Afterpay summary page, and again whenever they update their shipping address. During these calls, you should:

  • Use the address details in data to determine supported shipping options (e.g. by contacting your backend API).
  • Use actions.resolve to return the options to the Afterpay express checkout, or
  • Use actions.reject to signal any errors, providing an appropriate shipping constant

Data argument

PropertyTypeDescription
nameStringFull name of the consumer
address1StringFirst line of the address.
address2StringSecond line of the address
area2StringVillage/local area of the address
suburbStringSuburb/City of the address
stateStringAU: State
NZ: Region
UK: County
US: State
CA: Province or Territory
postcodeStringZIP or postal code. If the country does not have postcodes, the countryCode will be sent instead
countryCodeStringThe ISO 3166-1 alpha-2 country code.
phoneNumberStringThe phone number, in E.123 format.

Actions argument

PropertyTypeDescription
resolveFunctionCall this method to provide the shipping options applicable to the consumer’s address. Takes an array of Shipping Option objects.
rejectFunctionCall this method when you are unable to handle the request. Do not throw an error, instead call this method with a Shipping Constant as the first argument to indicate a status, e.g. actions.reject(Afterpay.CONSTANTS.SHIPPING_UNSUPPORTED)

Shipping options model

AttributeTypeDescription
idString (required)A shipping option identifier. Max length 128.
nameString (required)The name of the shipping option.
shippingAmountMoney (required)The shipping amount (without tax, if including taxAmount).
taxAmountMoney (optional)The tax amount.
orderAmountMoney (required)The total amount for the order including shipping and taxes.
descriptionStringA description for this shipping option.

Retrieve shipping options via API

1Afterpay.initializeForPopup({
2 // ...
3 onShippingAddressChange: function (data, actions) {
4 fetch('/your-shipping-endpoint', {
5 method: 'POST',
6 headers: { 'content-Type': 'application/json' },
7 body: JSON.stringify(data),
8 }).then(function(options) {
9 actions.resolve(options)
10 }).catch(function(error) {
11 // Parse the response and send a Afterpay rejection, e.g.:
12 actions.reject(Afterpay.CONSTANTS.SHIPPING_UNSUPPORTED)
13 })
14 },
15})

Calculate shipping options in Afterpay.js

1Afterpay.initializeForPopup({
2 // ...
3 onShippingAddressChange: function (data, actions) {
4 if (data.countryCode !== 'AU') {
5 // Reject any unsupported shipping addresses
6 actions.reject(Afterpay.CONSTANTS.SHIPPING_UNSUPPORTED)
7 } else {
8 // Calc shipping inline
9 actions.resolve([ {
10 id: '1', name: 'Standard', description: '3 - 5 days',
11 shippingAmount: { amount: '0.00', currency: 'AUD'},
12 taxAmount: { amount: '3.18', currency: 'AUD'},
13 orderAmount: { amount: '34.99', currency: 'AUD'},
14 }, {
15 id: '2', name: 'Priority', description: 'Next business day',
16 shippingAmount: { amount: '10.99', currency: 'AUD'},
17 taxAmount: { amount: '4.28', currency: 'AUD'},
18 orderAmount: { amount: '47.08', currency: 'AUD'},
19 } ])
20 }
21 },
22})

Shipping constants

To indicate error scenarios, call actions.reject() with the appropriate constant. The constants are in the form Afterpay.CONSTANTS.<NAME>, where <NAME> is one of the following:

ConstantDescription
SHIPPING_ADDRESS_UNRECOGNIZEDUnrecognized address.
SHIPPING_ADDRESS_UNSUPPORTEDRecognized address, but will not ship there.
SERVICE_UNAVAILABLEGeneral service error.
Note

Express checkout doesn’t perform any calculations. Your web app is responsible for calculating the correct total, including taxes and shipping, for each shipping option.

Optional callbacks

Listen for shipping option changes

The onShippingOptionChange callback is optional, allowing you to track the customer’s chosen shipping option as it changes. It will be called with a single Shipping Option argument each time the customer selects a shipping option.

1Afterpay.initializeForPopup({
2 // ...
3 onShippingOptionChange: function (data) {
4 console.log(data)
5 },
6})

If you need to modify the shipping option amounts after the user has selected a shipping option, use onShippingOptionChange with an additional action argument to update the checkout. When onShippingOptionChange is triggered:

  1. Use the shipping option data to perform the required modification (for example, recalculate the tax via your backend API).

  2. Once updated, use actions.resolve to return an object containing:

    • id: The same shipping option id from onShippingOptionChange
    • shippingAmount: The updated shipping amount for the selected option
    • taxAmount: The updated tax amount for the selected option
    • orderAmount: The updated order amount for the selected shipping option
  3. Use actions.reject to signal any errors.

1Afterpay.initializeForPopup({
2 // ...
3 onShippingOptionChange: function (data, action) {
4 fetch('/your-update-shipping-option-endpoint', {
5 method: 'POST',
6 headers: { 'content-Type': 'application/json' },
7 body: JSON.stringify(data),
8 }).then(function(options) {
9 actions.resolve({
10 id: data.id,
11 shippingAmount: { amount: '0.00', currency: 'AUD'},
12 taxAmount: { amount: '3.18', currency: 'AUD'},
13 orderAmount: { amount: '34.99', currency: 'AUD'},
14 })
15 }).catch(function(error) {
16 // Parse the response and send the error, e.g.:
17 actions.reject(error)
18 })
19 },
20})

Listen for error messages

To facilitate handling of log/warning/error messages, you can optionally replace Afterpay.onMessage with a custom function. It receives the following payload:

PropertyTypeDescription
severityStringOne of: log, warning, or error
messageStringThe message (normally displayed on the console)
1Afterpay.onMessage = function (payload) {
2 console[payload.severity](payload.message)
3}

Optional features

Target multiple checkout buttons

If you have multiple checkout buttons on the same page, these can be targeted by adding a common class to each of these buttons:

1<button class="Afterpay-express-button”>
2 Button 1 - Checkout using Afterpay Express
3</button>
4<button class="Afterpay-express-button”>
5 Button 2 - Checkout using Afterpay Express
6</button>

Then, set the target in the Afterpay.js initialize function with the common class. For example, set target in initializeForPopup:

1Afterpay.initializeForPopup({
2 // ...
3 target: ".Afterpay-express-button",
4});

Pickup orders

To support pickup orders using integrated shipping, follow these steps:

  1. Allow customers to select pickup options (e.g. pickup location and date) that impact shipping costs before launching express checkout.
  2. When a customer selects pickup, use the pickup address in the shipping body parameter when creating the order.
  3. When calling initializeForPopup, set addressMode to Afterpay.ADDRESS_MODES.PICKUP_FROM_ORDER_ADDRESS.
    1Afterpay.initializeForPopup({
    2 // ...
    3 addressMode: Afterpay.ADDRESS_MODES.PICKUP_FROM_ORDER_ADDRESS,
    4})
  4. Configure onShippingAddressChange to return the name and description of the pickup selection. This typically means returning a single option, for example:
    1actions.resolve([ {
    2 id: 'pickup-store-123', name: 'Click & Collect',
    3 description: 'Available for next-day pickup',
    4 shippingAmount: { amount: '0.00', currency: 'AUD'},
    5 taxAmount: { amount: '3.18', currency: 'AUD'},
    6 orderAmount: { amount: '34.99', currency: 'AUD'},
    7} ])
  5. Optionally, you can collect additional pickup information (for example, an alternate pickup person) on your order review page.

If initializeForPopup is called before you know whether a customer has selected pickup, you can safely call initializeForPopup again. Each call overwrites the previous calls.

Preselect shipping option

If customers can choose a shipping option on your site before launching express checkout, you can send us this information when checkout launches.

  1. Set the shippingOptionIdentifier in the body parameter when creating the order. This preselects the option if it’s returned from onShippingAddressChange when checkout loads.
  2. Set addressMode in Afterpay.initializeForPopup() to define how the shipping address is handled.
    • To provide a list of shipping options, use Afterpay.ADDRESS_MODES.SHIP_TO_ORDER_ADDRESS
    • To not provide a list of shipping options, use Afterpay.ADDRESS_MODES.SHIP_TO_ORDER_ADDRESS_WITHOUT_SHIPPING_OPTIONS
  3. Include the shipping address in the shipping parameter when creating the order.
1curl --request POST \
2 --url https://api-sandbox.afterpay.com/v2/checkouts \
3 --header 'accept: application/json' \
4 --header 'content-type: application/json' \
5 --data '{"amount":{"amount":"10.00", “currency”: “AUD”}, “mode”: “express”, "merchant": {"popupOriginUrl": "https://example.com"}, "shipping": {"name": "Your Store Name", "line1": "123 Store Address", "postcode": "0000"}, shippingOptionIdentifier: “standard”
6}}'

Errors

The following errors can occur during Afterpay express checkout with integrated shipping:

ErrorHow to Proceed
Uncaught ReferenceError: Afterpay is not definedEnsure that Afterpay.js is being loaded on your page before referencing it, e.g. by using the onload script attribute.
Uncaught ReferenceError: initAfterpay is not definedEnsure that initAfterpay is defined before the script tag that loads Afterpay.js.
Afterpay popup opens but doesn’t launch a checkoutEnsure your onCommenceCheckout handler has no errors (check the console), and that it calls actions.resolve with a valid token.
onComplete callback is not called when checkout finishesThis can occur due to issues with postMessage communication, especially with in-app browsers. Contact Afterpay with steps to replicate the issue.
onShippingAddressChange is not being called on address changesEnsure that popupOriginUrl was correctly defined when creating the checkout token.
Afterpay checkout does not display shipping options from the merchantEnsure your onShippingAddressChange handler calls actions.resolve with a valid list of shipping options.
The shipping address is invalid or ineligible for shippingUse actions.reject with a valid Shipping Constant to signal your rejection of the address to Afterpay.
There are missing fields on the provided addressonShippingAddressChange sends a reduced address payload with only the data needed to calculate shipping. Full address details should be retrieved after the checkout finishes.