Opencart
Configure Afterpay Payment
Complete the steps below to enable Afterpay for use as a payment method on product or cart and checkout pages.
If you have already enabled Afterpay and would like to implement Express Checkout, visit the Opencart Afterpay Express Checkout Implementation Guide.
Afterpay on your Checkout Page
The Afterpay Opencart plugin can be downloaded HERE
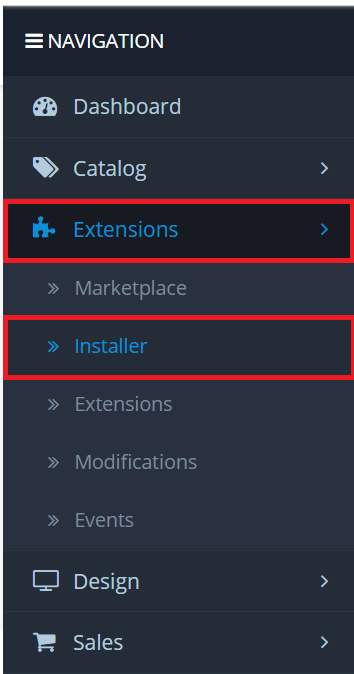
- Log into the Opencart Website Admin Portal.

- Go to Extensions > Installer.
- Click Upload.
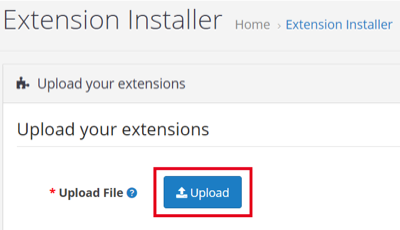
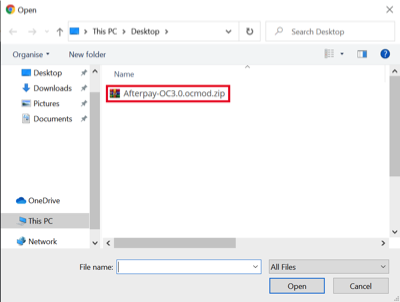
- Ensure that the Opencart Afterpay Plugin has been downloaded, if not please download it HERE Then locate the plugin in the pop-up and select/open it.
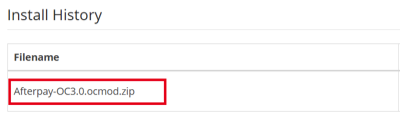
If successful the Afterpay plugin is visible under Install History.
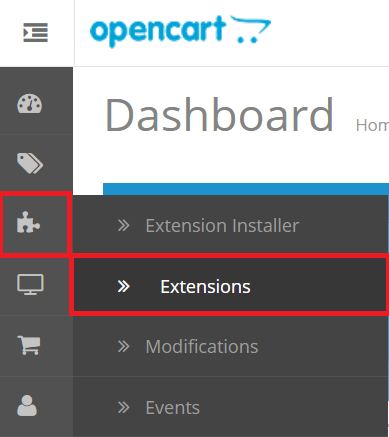
- Now go back to Extensions > Extensions.
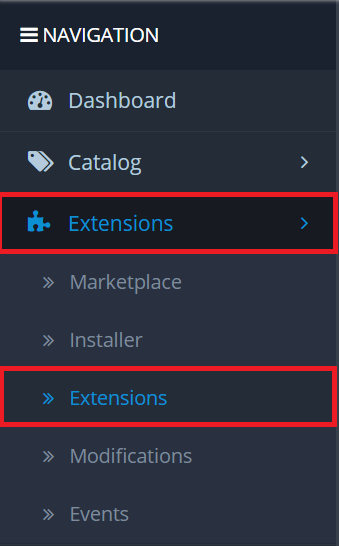
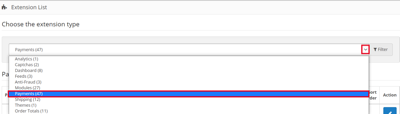
- Click the drop down menu and click Payments.
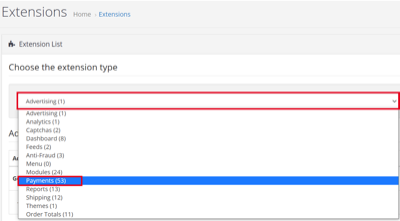
- Locate the Afterpay plugin and click the install + button, if successful the install button changes to an uninstall - button.

- To setup and enable Afterpay, click the Edit button.

- Enter the Afterpay setup values listed below and click Save when complete.
Test (Sandbox) Mode: Set to No
![]()
Merchant ID: and Secret Key - input the Merchant ID and secret key provided in your merchant on-boarding email.

Merchant Minimum Order Threshold: This field is automatically populated based on the Merchant ID used in the step above.
Merchant Maximum Order Threshold: This field is automatically populated based on the Merchant ID used in the step above.

Geo Zone: Leave as All Zones.
![]()
Badge Theme: We recommend you leave this option as Black on Mint (Default)
![]()
Display Afterpay in Product Listings: Set to Enabled.
![]()
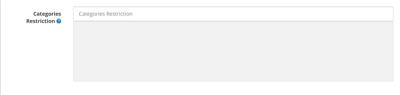
Categories Restriction: If the Afterpay team have requested that certain items/categories are not available with Afterpay, add them here.
Status: Set to Enabled.
![]()
Sort Order: Leave blank or set to 1.
![]()
- When all options are complete, click the Save button.
![]()
If the setup is correct you will not receive any error messages.
If an error message appears, try to copy and paste the Merchant ID and Secret Key again. Make sure there are no spaces at the start or end of these codes. The codes are in the on-boarding email sent to you by Afterpay.
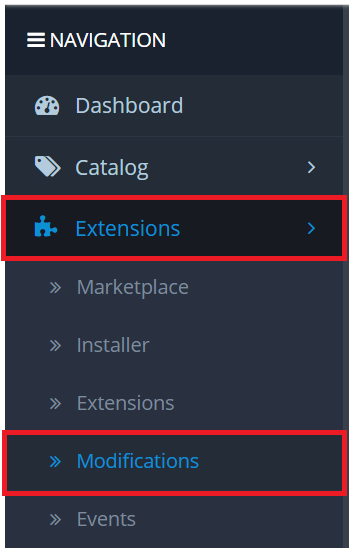
- Go to Extensions > Modifications.

- Click the Refresh button to reload the cache.
![]()
If succesful, you will see this notification:
![]()
Afterpay is now installed and available for use by customers.
Afterpay appears on the product pages and as a payment option on the checkout page.
Express Checkout
Afterpay on your Product and Cart Pages
If you are following on from the above instructions, you can skip straight to Step 5. Complete the steps below to enable customers to complete purchases from your product and cart pages.
- Log into the Opencart Website Admin Portal:
- Go to to Jigsaw Icon > Extensions.
- Click the dropdown arrow and select Payments.
- If you have already setup the Afterpay extension on your checkout page, skip this step.
Locate the Afterpay plugin and click the install + button, if successful the install button will now appear as an uninstall - button.

- To setup and enable Afterpay click the Edit button.

-
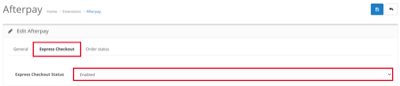
Click the Express Checkout tab.
-
Set the Express Checkout Status: to Enabled.
- Click the Save icon when you have completed all the options.
![]()
- Go to Extensions > Modifications.
- Click the Refresh button to reload the cache.
![]()
- If successful this notification appears:
![]()
Afterpay is now installed and available for use by customers. Afterpay appears on Product, Cart and Checkout Pages as a payment option.
Supported Countries
The Afterpay extension is available for Opencart merchants with a store in these countries:
-
🇦🇺 Australia
-
🇳🇿 New Zealand
-
🇨🇦 Canada
Afterpay is known as Clearpay in the below regions and the extension is available for these countries: