Create a checkout
There are three steps to create an Afterpay checkout:
- Call Get Configuration to retrieve your order limits
- Call Create Checkout to generate a checkout token
- Launch the Afterpay checkout flow using a redirect or a popup window
Retrieve your order limits
Call the Get Configuration endpoint to retrieve your minimum and maximum Afterpay order amounts.
We recommend calling this endpoint once a day as part of a scheduled background process, and storing the minimumAmount and maximumAmount values on your server.
Use these values to determine:
- The correct Afterpay Messaging to show on the Product Detail pages
- Whether Afterpay should be presented as an available payment method
A request to create a checkout will be declined if the order grand total is less than the minimum or more than the maximum Afterpay amount. To change your minimum and maximum order values, contact Afterpay.
Create a checkout
Call the Create Checkout endpoint to communicate the order details to Afterpay. Your request should include:
- Customer information
- Order details
- Order total
- Shipping details
- Redirect URLs
Afterpay uses the order total value to calculate the installment plan and to assist with the customer’s pre-approval process.
Afterpay responds with a token used to identify this checkout.
For example, 002.5lmerr3k945d00c7htvcrdff83q36kp10a247m212fjpa5ju. This token is used to launch the Afterpay checkout flow using Afterpay.js.
Afterpay.js
Set up your checkout experience
As part of your integration, decide how customers will complete the Afterpay checkout flow. There are two options:
- Redirect method: Customers are redirected from your website to Afterpay to complete their payment. At the end of the Afterpay checkout flow, the customer is redirected back to your website. Most merchants use this method.
- Popup method: The Afterpay checkout flow opens in a popup window on top of your site. For windowed applications, your website is dimmed with a semi-transparent overlay. For full-screen applications (such as mobile interfaces), the flow opens in a new tab. At the end of the Afterpay checkout flow, the popup closes.
Implement the redirect method
To use the redirect method, call the following two JavaScript functions, in order:
AfterPay.initialize: Prepares the Afterpay JavaScript to start the Afterpay screenflow in the appropriate geographical region.- Accepts an object with a required
countryCode(the two-character ISO 3166-1 country code of the merchant account)
- Accepts an object with a required
AfterPay.redirect: Redirects the customer’s browser from your website to Afterpay.- Accepts an object with a required
token(the checkout token returned by the Create Checkout API call)
- Accepts an object with a required
If the customer successfully completes the checkout flow, they’re returned to your redirectConfirmUrl with a checkout token and a SUCCESS status appended as HTTP query parameters: www.merchant-example.com/confirm?&status=SUCCESS&orderToken=002.5lmerr3k945d00c7htvcrdff83q36kp10a247m212fjpa5ju
If the customer cancels the checkout, they’re returned to your redirectCancelUrl with a checkout token and a CANCELLED status appended as HTTP query parameters: www.merchant-example.com/confirm?&status=CANCELLED&orderToken=002.5lmerr3k945d00c7htvcrdff83q36kp10a247m212fjpa5ju
Implement the popup method
To use the popup method, call the following JavaScript functions, in order:
AfterPay.initialize: Prepares the Afterpay JavaScript to start the Afterpay screenflow in the appropriate geographical region.AfterPay.open: Opens the Afterpay popup window, launching the checkout flow for the customer.AfterPay.onComplete: Defines a callback function. It checks whether the customer successfully completes the checkout flow and handles successful payments and cancellations.AfterPay.transfer: Sends the checkout token to Afterpay, finalizing the payment process.
When a customer’s payment is complete, Afterpay uses postMessage to call a JavaScript method on your front end system.
Note
The popup method doesn’t redirect customers to the redirectConfirmUrl or redirectCancelUrl, but these fields are still required for the Create Checkout call. These fields are used for context on postMessage.
If the customer successfully completes the checkout flow, Afterpay calls the onComplete method on your website. Afterpay passes the checkout token and a SUCCESS status as properties of a data object. The popup closes.
If the customer cancels the checkout, Afterpay calls the onComplete method on your website. Afterpay passes the checkout token and a CANCELLED status as properties of a data object. The popup closes.
Note
At the end of the checkout flow, if the protocol, host, and port of the opening window don’t match those provided in Create Checkout, the customer’s browser won’t dispatch the JavaScript event for security reasons.
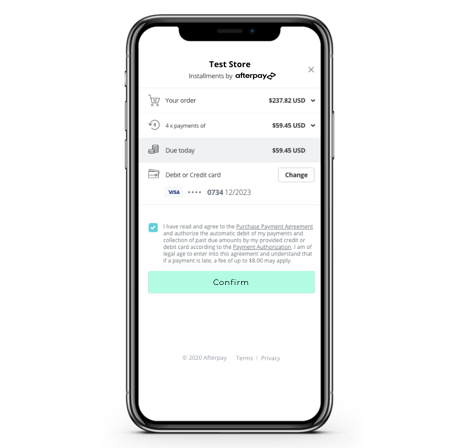
Final Afterpay checkout screen