Configure Plugin
How can I add Afterpay as a payment method and display Afterpay Site Messaging?
Configuration
Complete the steps below to enable and display Afterpay as a Payment Method, and add Afterpay messaging to product pages.
Note
If you have completed the Afterpay Gateway Installation steps, go to Step 3.
-
Go to the WordPress Admin Dashboard.
-
Go to Plugins* > Installed Plugins.
-
Find the Afterpay Gateway for WooCommerce in the plugin list and click the Settings button.

-
Go to the Core Configuration section.
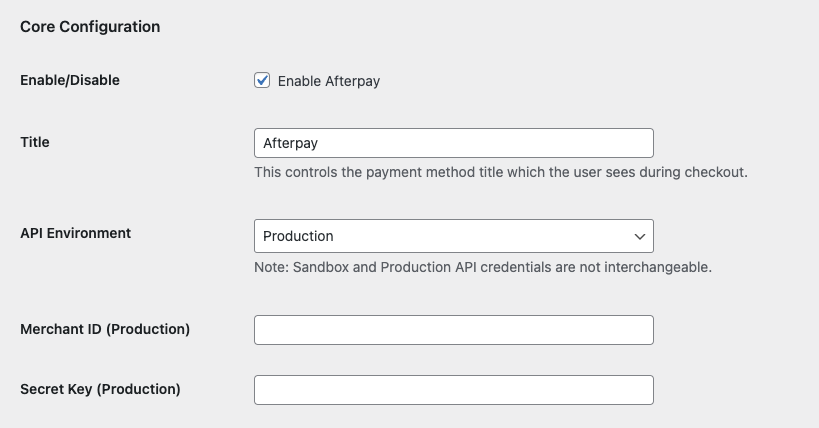
-
Enter the Merchant ID provided by Afterpay into the Merchant ID field.

-
Enter the Secret Key provided by Afterpay into the Secret Key field.

-
Click the Save changes button at the bottom of the page.
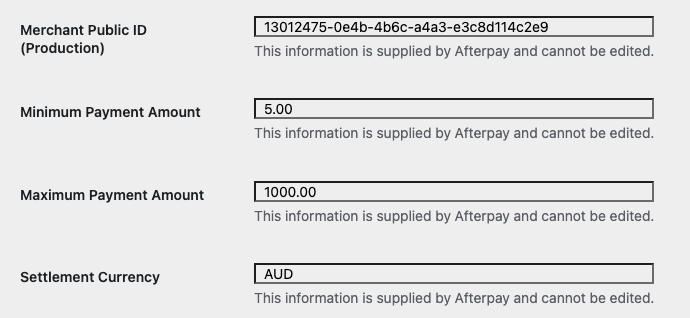
Note
After a successful save of the Afterpay credentials, the Merchant Public ID, Minimum Payment Amount, Maximum Payment Amount and Settlement Currency values are updated.
Note
The Sandbox API Environment is only applicable for dedicated test websites. Contact your Afterpay Account Manager if you need test credentials.
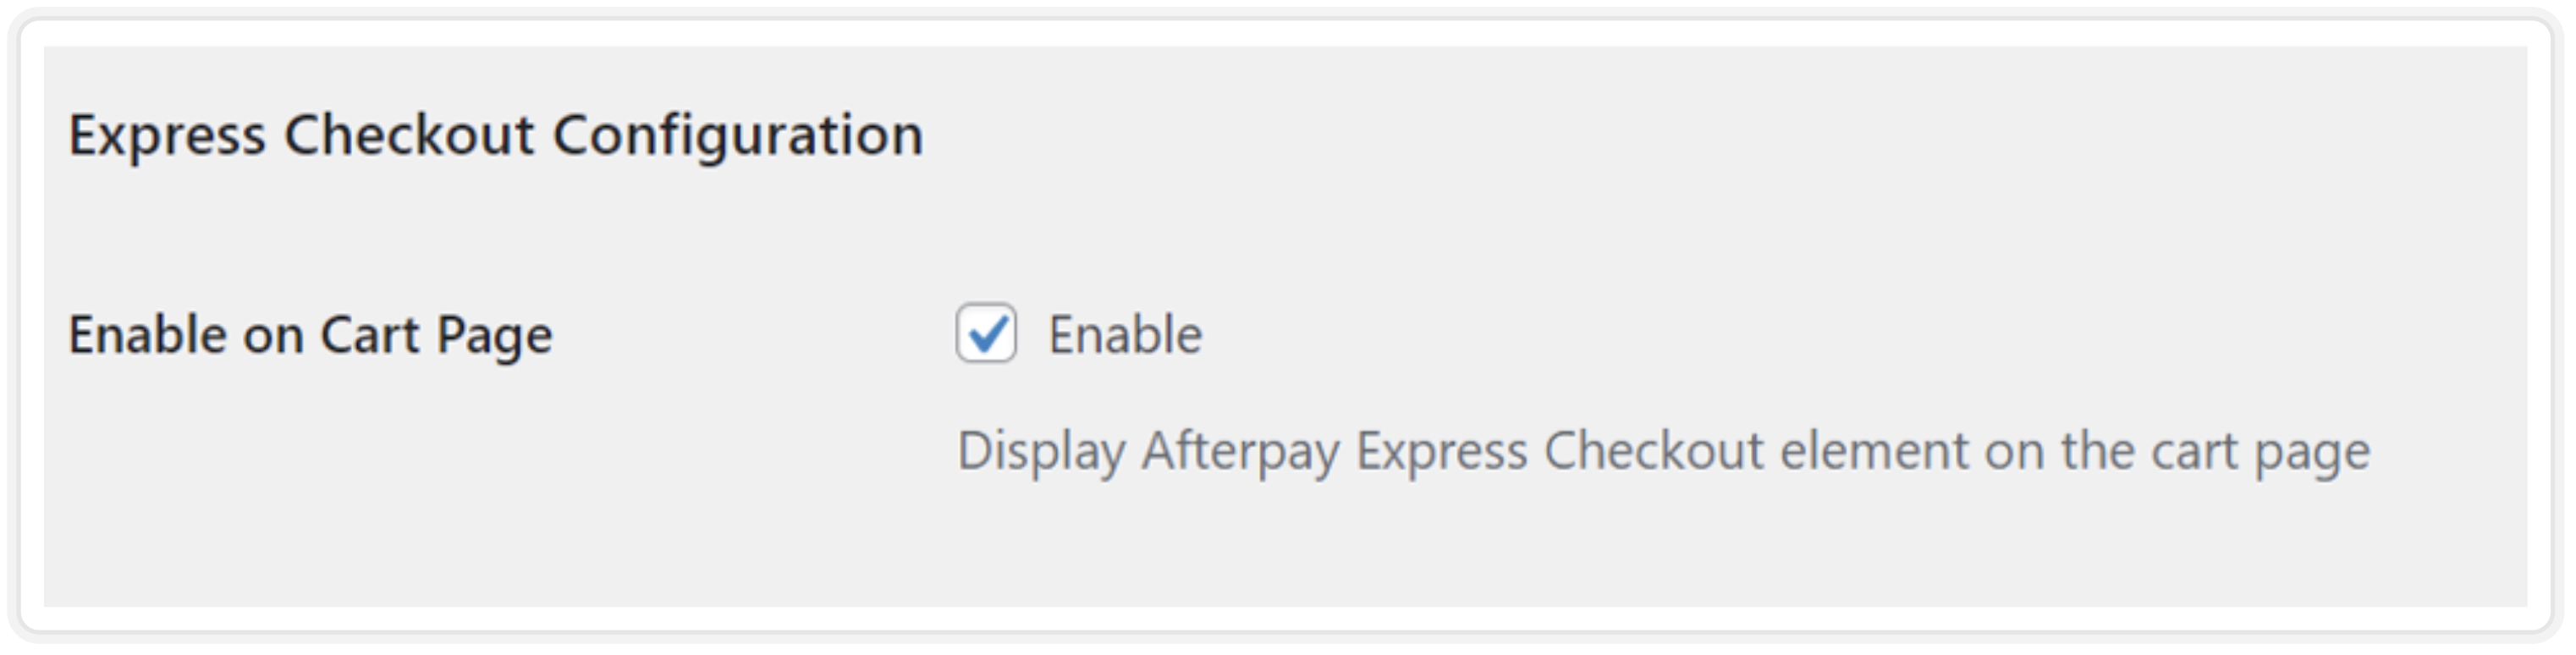
Enable Express Checkout
To enable Express Checkout:
-
Go to WordPress Admin Dashboard.
-
Go to Plugins > Installed Plugins.
-
Find the Afterpay Gateway for WooCommerce in the plugin list and click the Settings button.
-
Find Express Checkout Configuration and enable the checkbox.
Enabling the Afterpay Messaging for WooCommerce
The Afterpay messaging can be enabled on:
-
Category Pages
-
Product Pages
-
Cart Page
To start do the following:
-
Login to the Wordpress Dashboard.
-
Go to Plugins > Installed plugins > Afterpay Gateway for Woocommerce and click Settings.

Under Settings, you can see settings for:
These settings are described below.
Payment Info on Category Pages
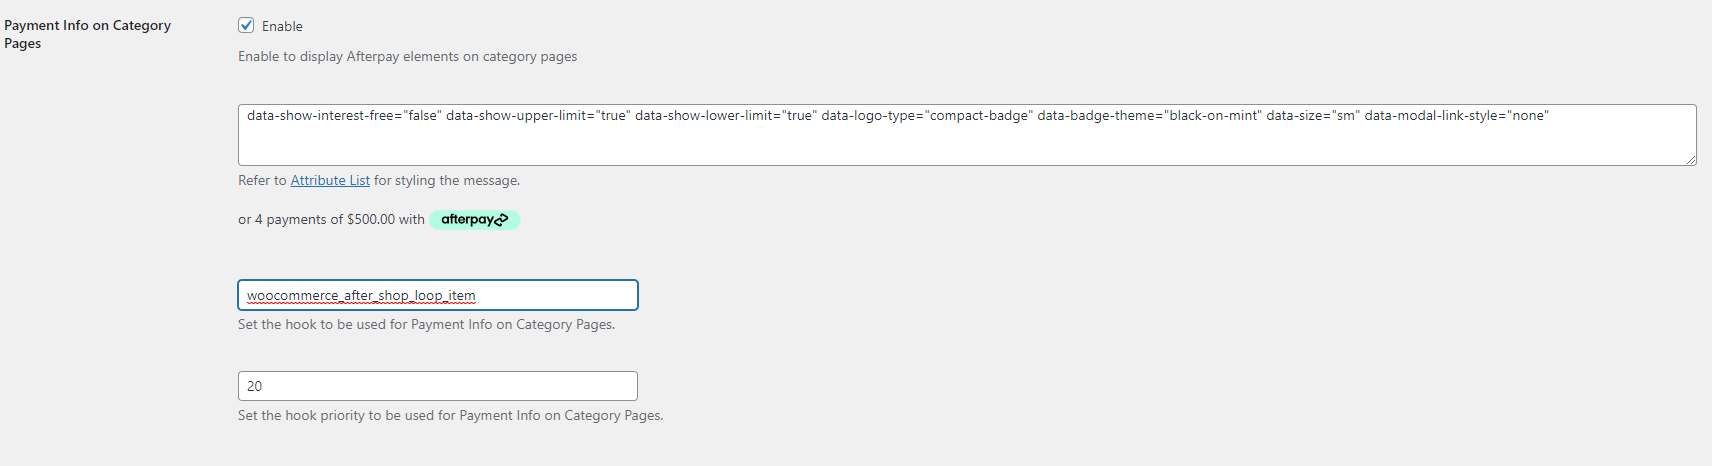
To enable the messaging on the Category page, do the following:
-
Ensure the Enable checkbox is enabled.
-
Enter the correct hook to position the messaging and set the priority to increase or decrease the height of the Messaging position. See the Hook section below.
Hook
The positioning of the Messaging for Woocommerce relies on a hook. This link is a guide to understanding hook positioning on Category pages.
Warning
The hooks for Category pages and Product pages are completely different.
For example, use the hook woocommerce_after_shop_loop_itemto position the messaging under the price:

Below is an example of a category page with Afterpay messaging:

Note
For more information on hooks, see the Hooks page.
Payment Info on Individual Product Pages
To enable the messaging on the individual Product page, do the following:
-
Ensure the Enable checkbox is enabled.
-
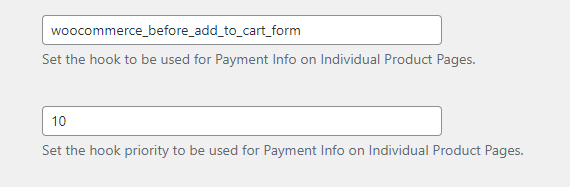
Enter the correct hook to position the messaging and set the priority to increase or decrease the height of the Messaging position. See the Hook section below.
Hook
The positioning of the Messaging for Woocommerce relies on a hook. This link is a guide to understanding hook positioning for Product pages.
🚧 Warning
The hooks for Product Pages and Category Pages are completely different.
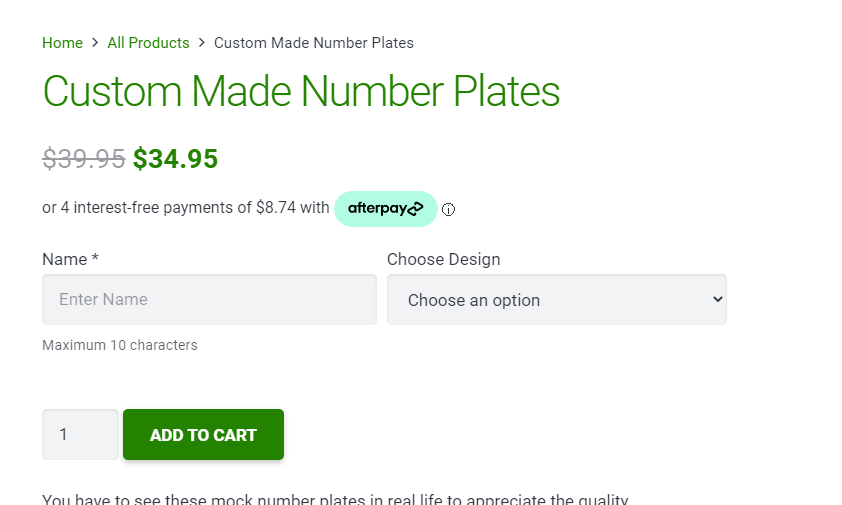
For example, use the hook woocommerce_before_add_to_cart_form to position the messaging directly under the Product Page price:
Below is an example of a Product Page with Afterpay messaging:
Note
For more information on hooks, see the Hooks page.
Payment Info Display for Product Variant
This option enables the Afterpay Messaging for any variant products.
For example a product that has a price range from 200. The Afterpay Messaging will also display the instalment breakdown according to a price range.
When a customer selects a variant, a specific price appears. This option enables the Afterpay Messaging to display a specific price breakdown.